

×
1
- Log in to cuAnywhere® Online Banking
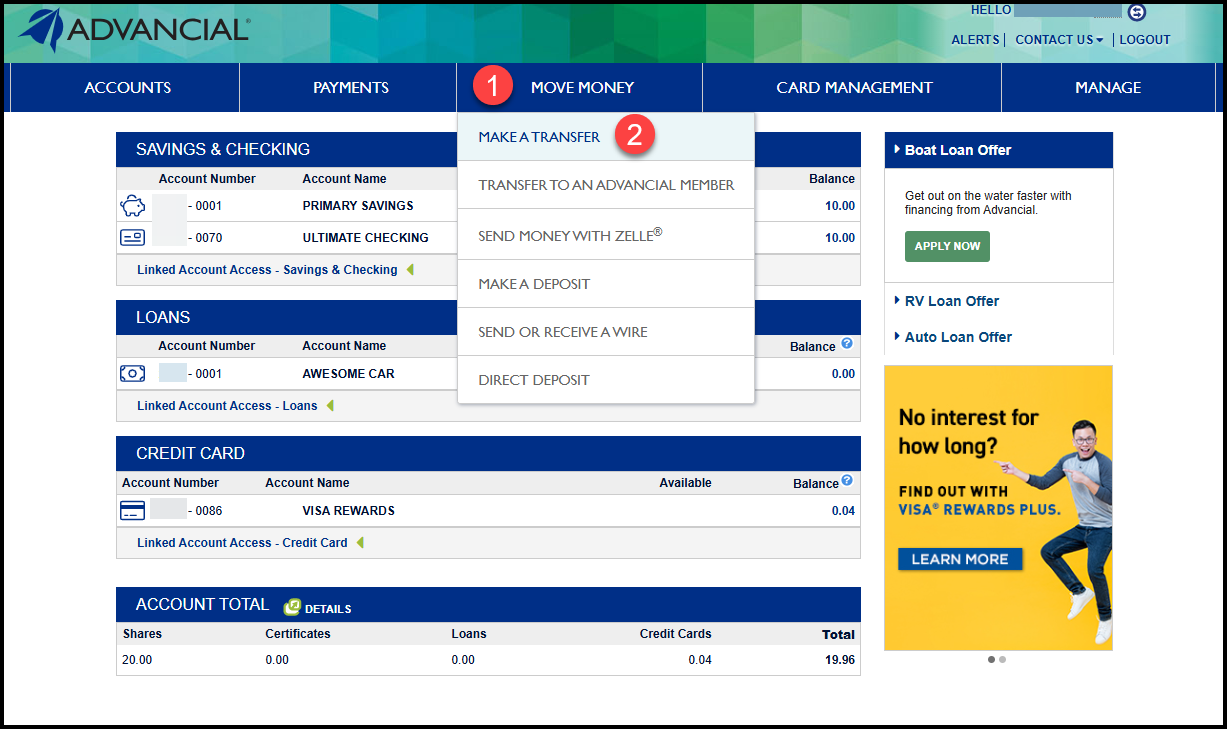
- Navigate to Make a Transfer:
- Move Money > Make A Transfer
2
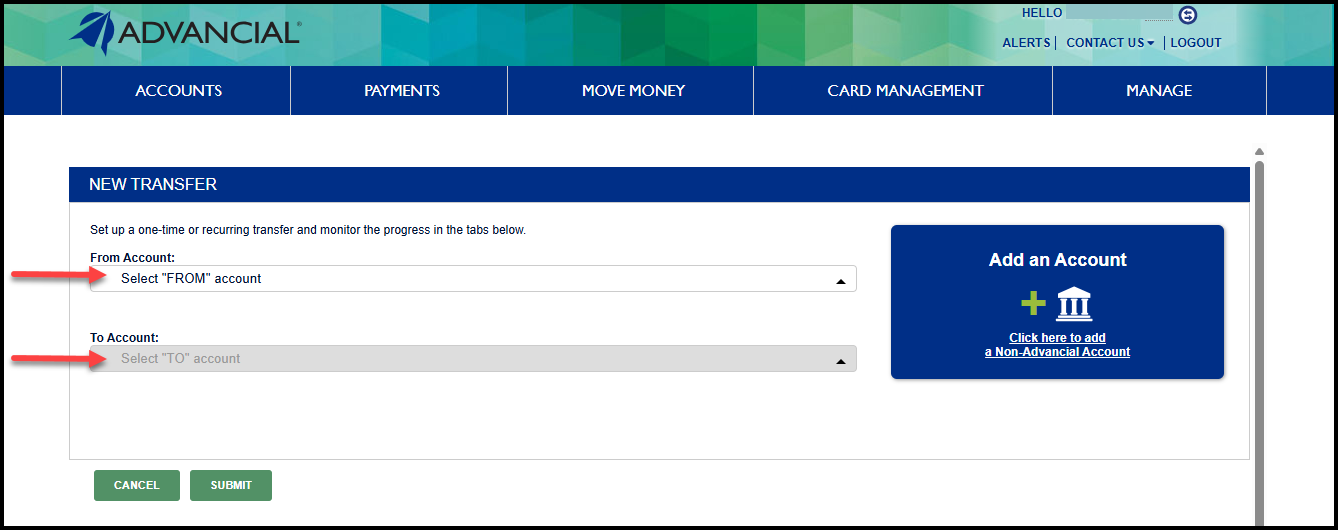
- Select the "From" account
- Select the "To" account
- Linked non-Advancial accounts will also be available for selection
3
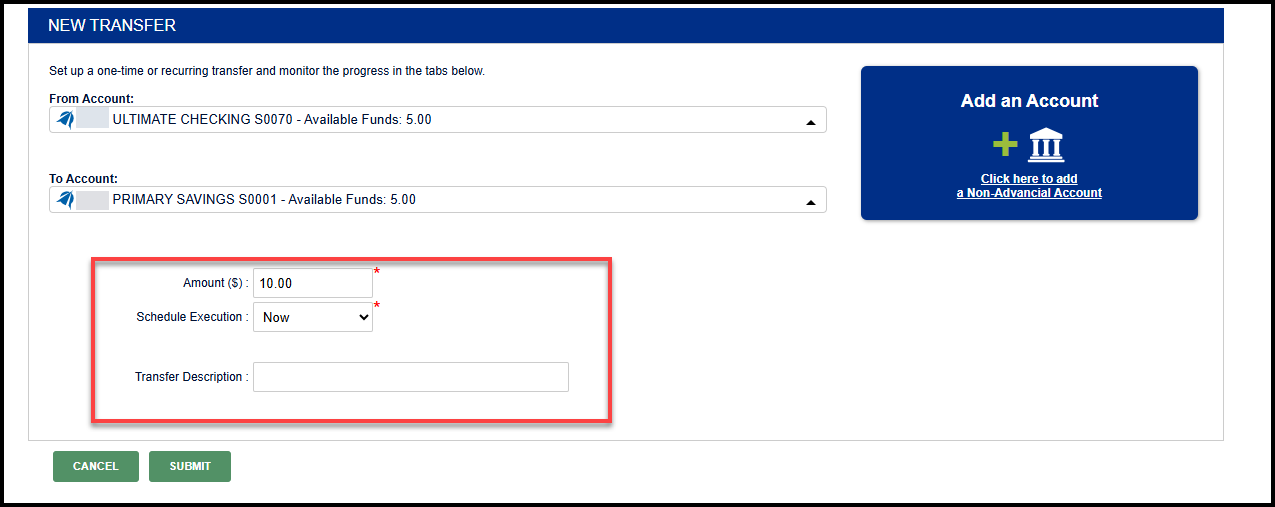
- Enter the transfer amount
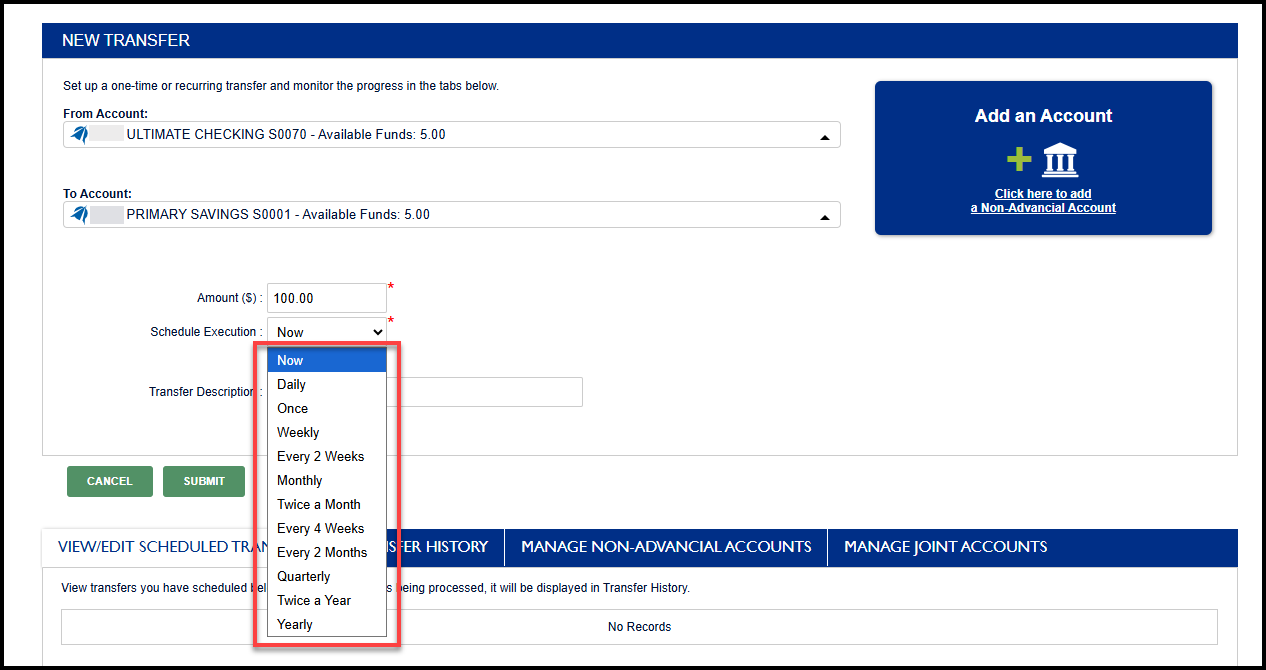
- Select when the transfer should occur
- Enter an optional transfer description
- Note: If you selected "Now" under Schedule Execution, click "Submit" to complete your transfer
4
- To schedule a future or recurring transfer, select how often the transfer should occur
5
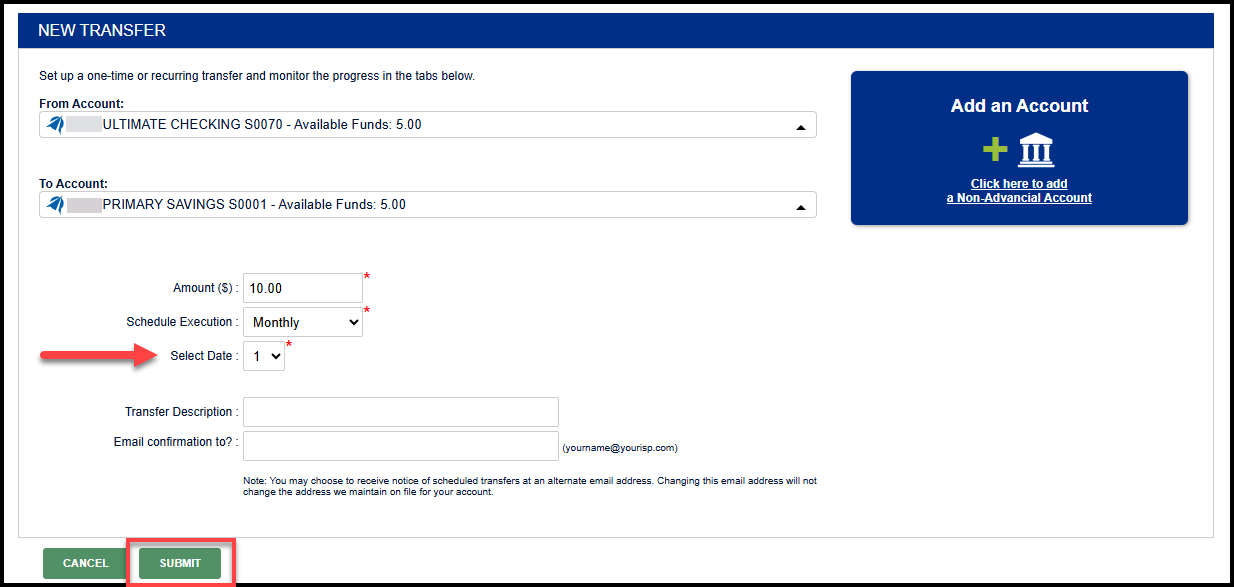
- Select the day the transfer should occur
- Enter an optional email address to receive transfer notifications
- Click "Submit"
6
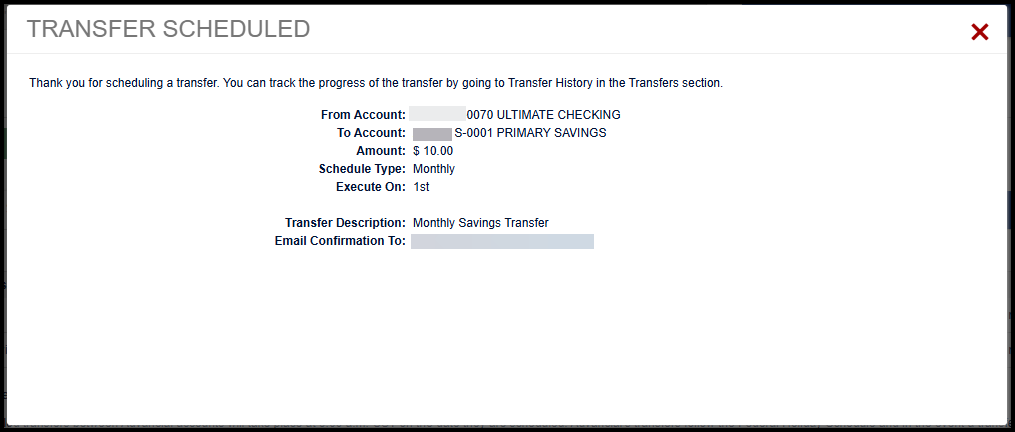
- A confirmation screen appears, indicating the transfer was successfully submitted
7
To modify scheduled transfers:
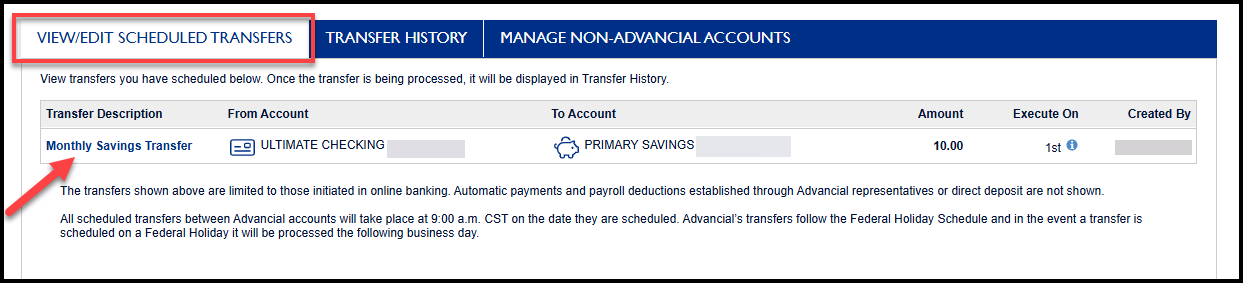
- Select "View/Edit Scheduled Transfers"
- Select the scheduled transfer you would like to edit
8
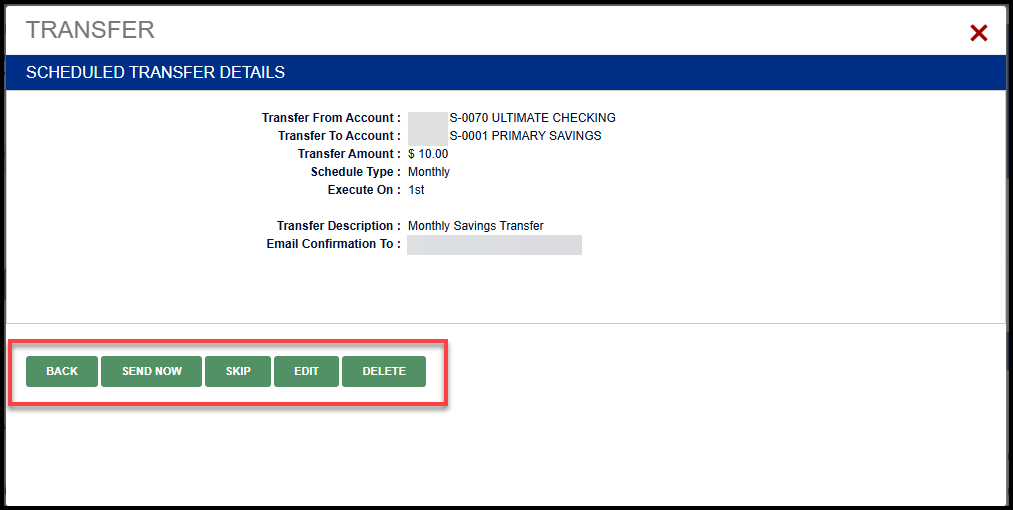
- Use the available options to modify the scheduled transfer